1243
1243
The Focus Communication module enables users to send email, phone calls and SMS for parents, students, and staff. Messages can be scheduled for future delivery or saved as drafts, and all incoming and outgoing messages are conveniently stored for easy review and reply management.
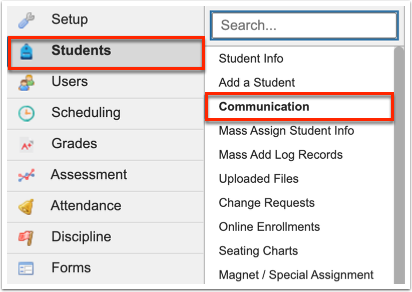
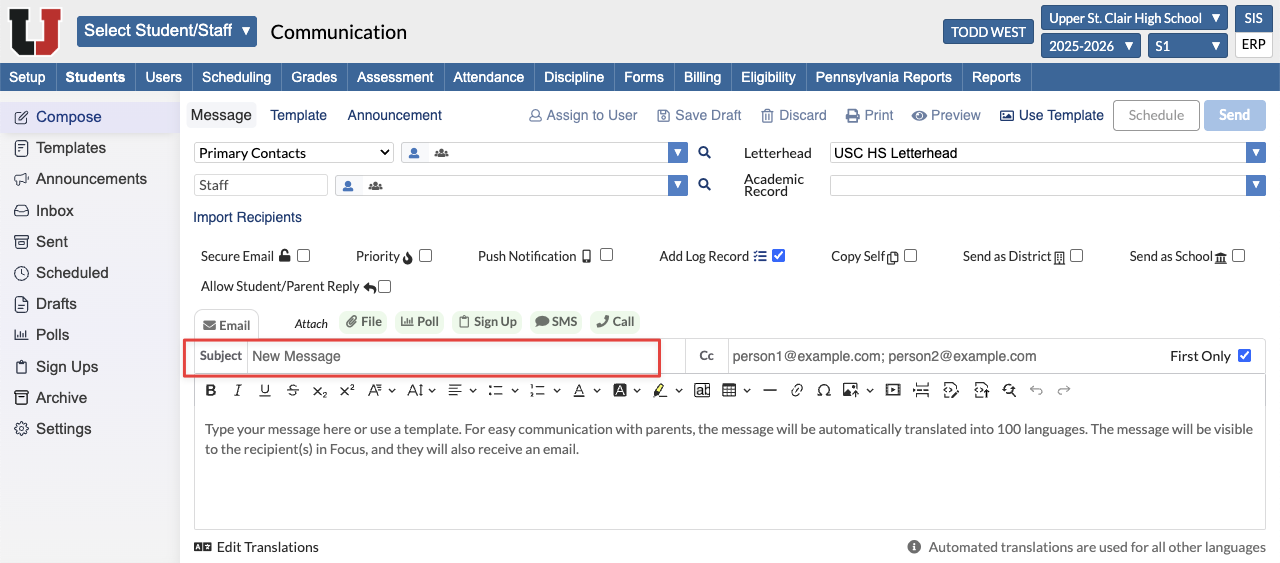
1. In the Students menu, click Communication.
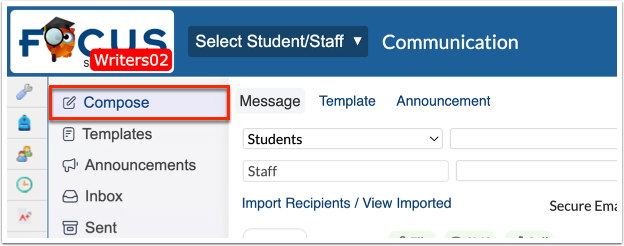
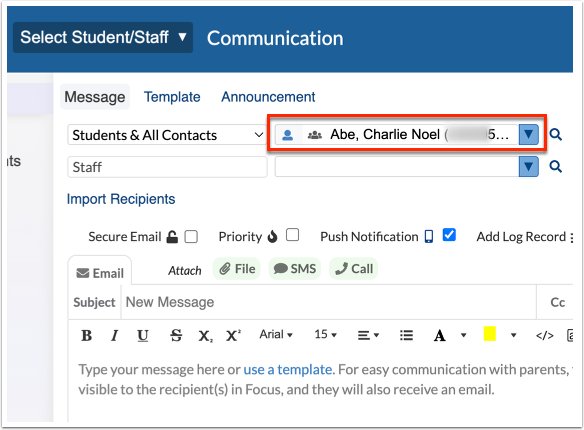
2. Click the Compose tab.
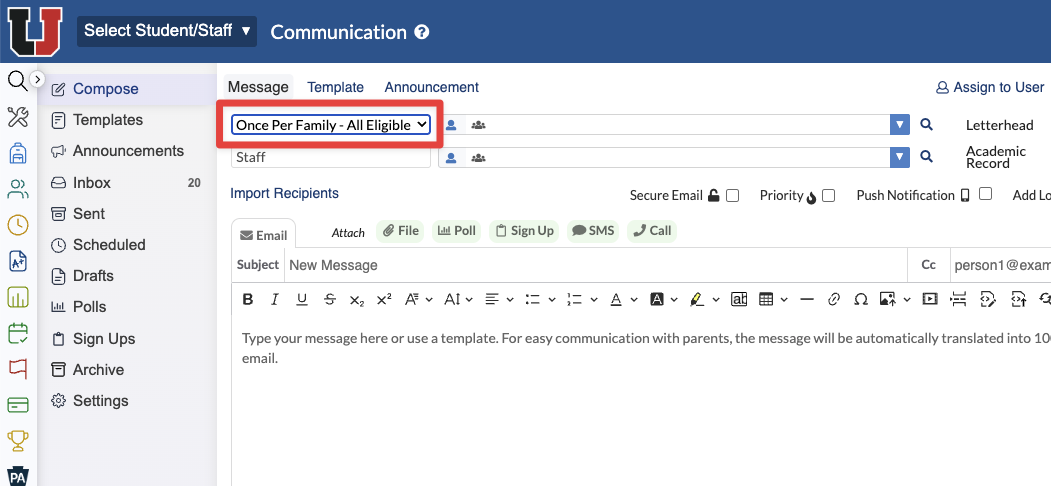
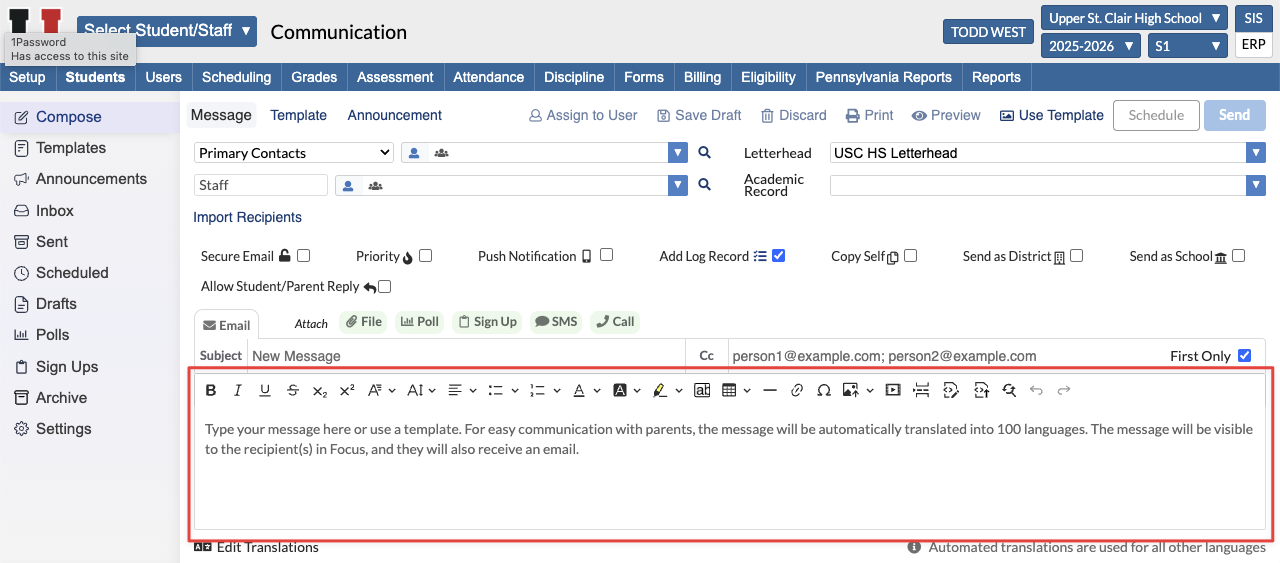
3. Select the student recipient type from the provided pull-down. This option allows you to choose how the Student and/or Family will be receiving the message. Options include:
- Once Per Family - All Eligible Phone Numbers limits to to all the contacts marked as custody and all phone numbers for those contacts that are marked with the Callout or SMS flag, but it removes duplicate recipients. For example, this would prevent a family with three children in the district from receiving the same call or email three times.
- Primary Contacts - All Eligible Phone Numbers limits to to all the contacts marked as custody and all phone numbers for those contacts that are marked with the Callout or SMS flag. This would be useful in situations where the message contains merge fields specific to individual students where families would need to receive the same message for each child in their family.
- Student Personal sends the message to the student's school email address as identified in Student Info.
- Teachers Of sends the message to all the students' current teachers.
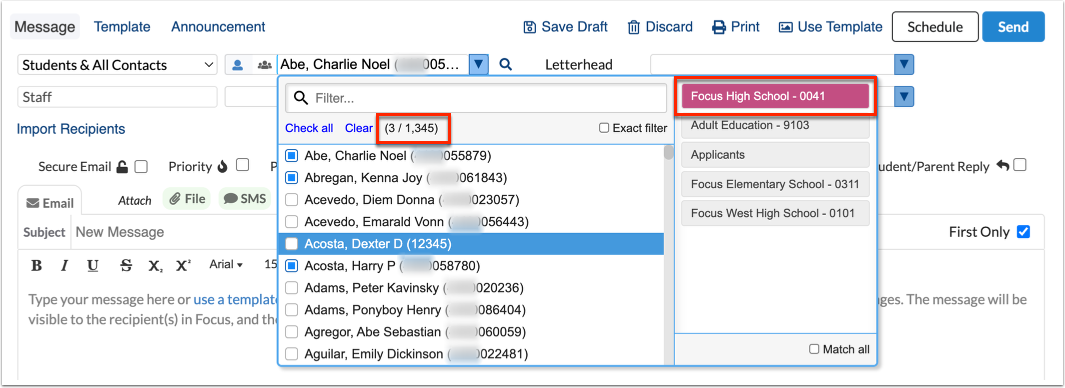
4. Select the Student Recipients from the provided pull-down. Select which Students should receive the message. If you have access to multiple schools, the Student recipient pull-down allow you to filter by school. The number of selected recipients displays in the right corner to ensure you have the correct number of recipients selected out of the number possible.
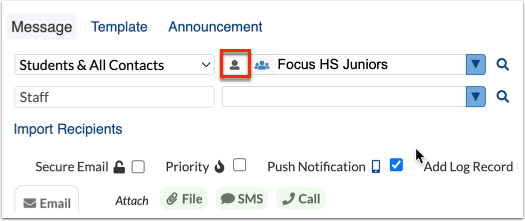
a. If you want to send to a specific group of students, click the Student Groups icon.
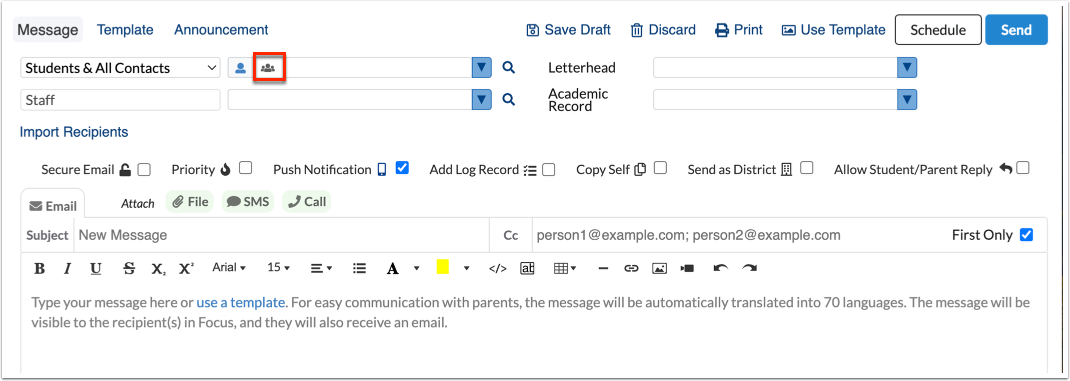
Upon clicking the Student Groups icon, the pull-down displayed all available student groups. Select the applicable student group from the pull-down.
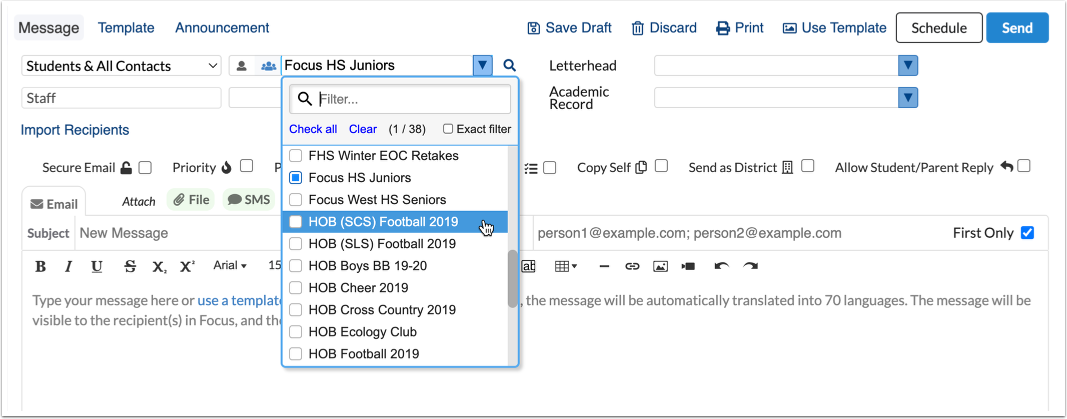
Click the Students icon to switch back to a Students pull-down.
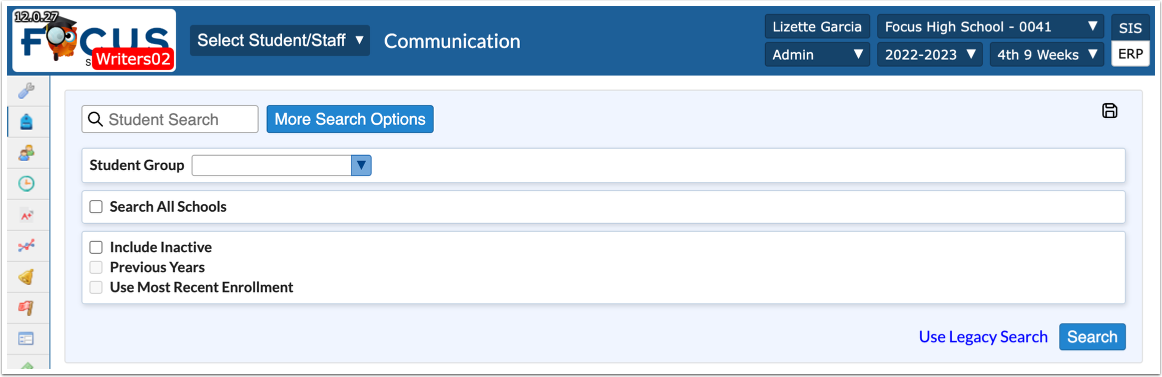
b. Click the More Search Options icon (magnifying glass) to conduct a student search and utilize More Search Options. This is useful for searching based on things such as Homeroom, Team Name, Counselor, etc...
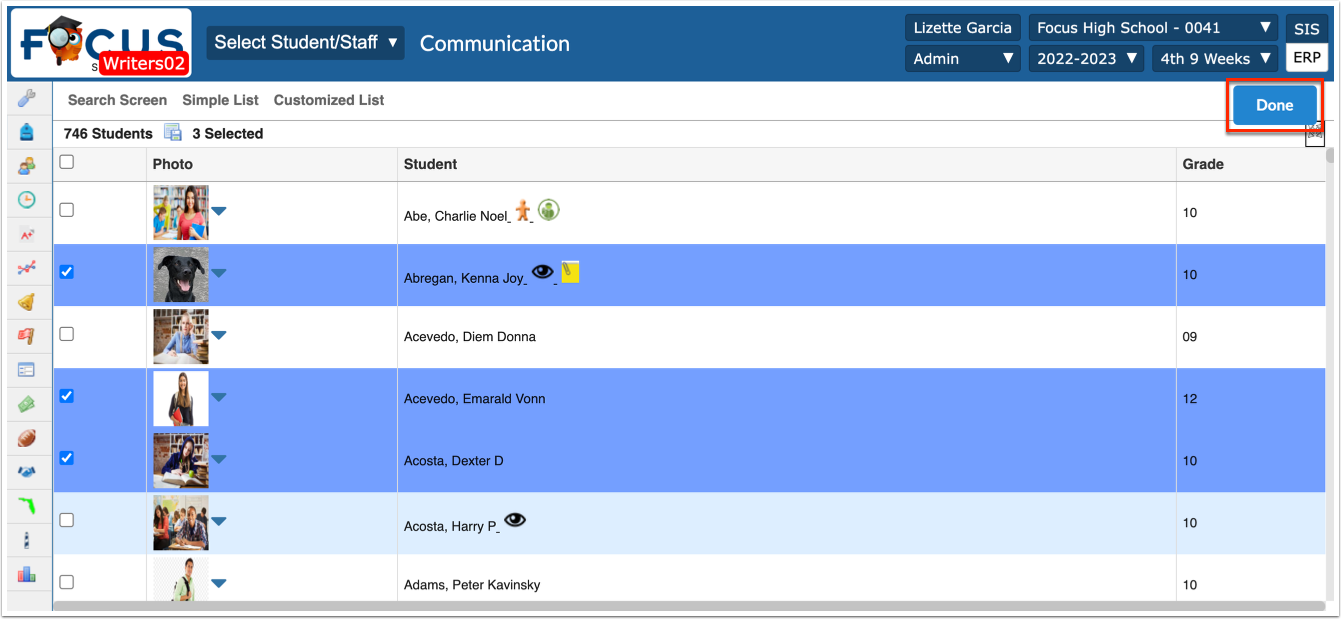
Perform the student search based on your specific search criteria. Using the check boxes displayed next to the students, select the students to whom you'd like to send the message. The selections here populate the original student pull-down. Select the check box in the header to select all displayed students at once. Then click Done.
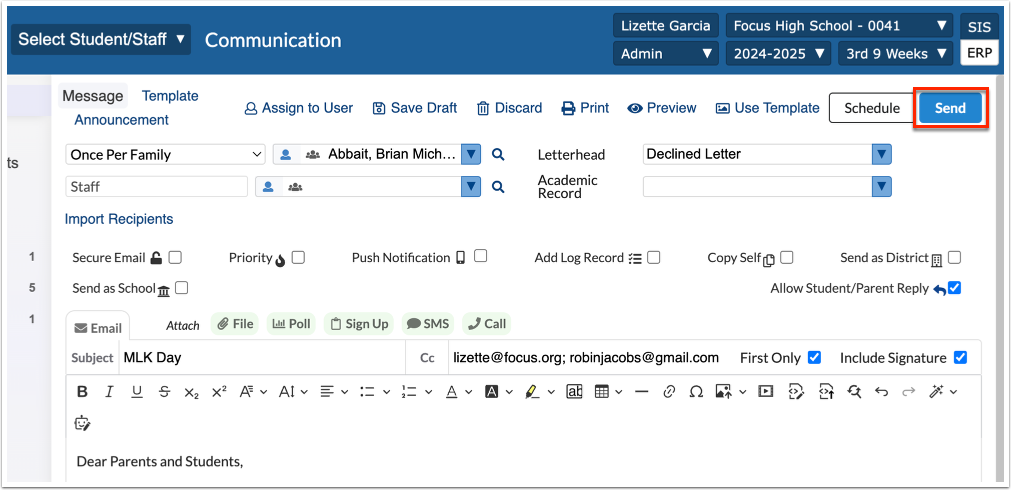
5. Select the Letterhead template that you'd like applied to your message from the pull-down, if applicable.
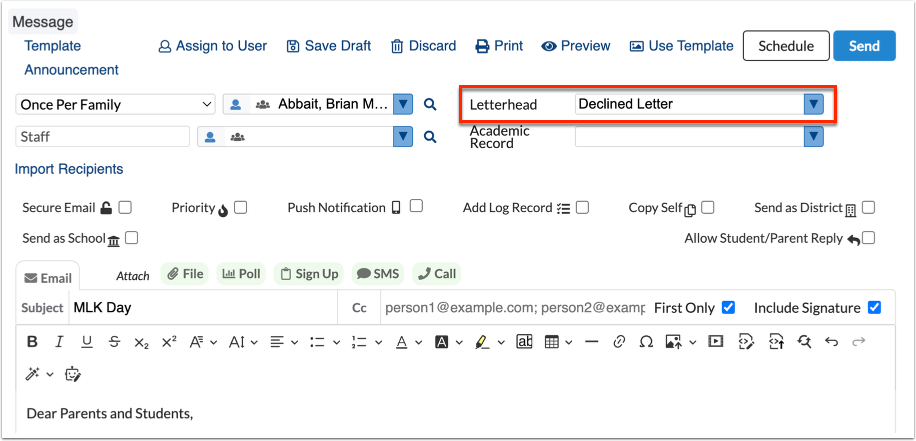
6. Select the Add Log Record check box to log the message in the students' and/or users' Letter Log record in Student Info and/or User Info. The message will be logged when the message is sent.

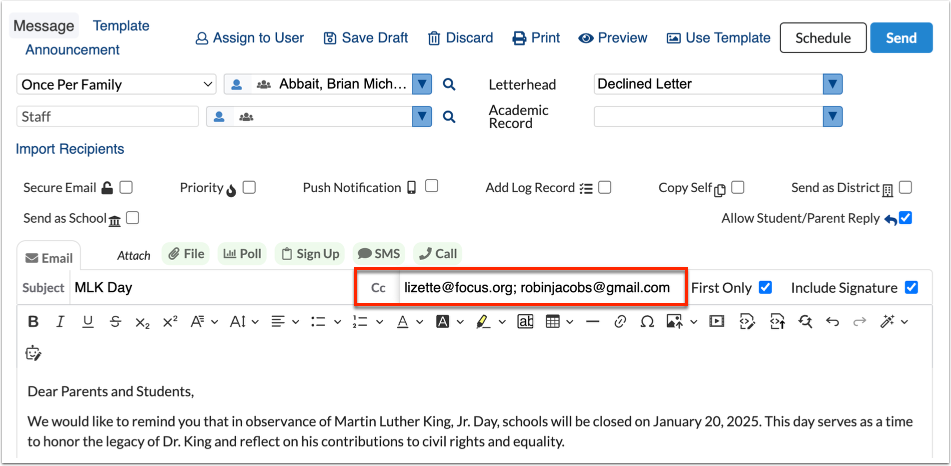
7. Select the Send as District or Send as School check box to send messages (and attachments) to recipients from the "district or school;" the message displays as if sent by the district or the specific school and doesn't include your name or information. Once sent, you will receive a confirmation that the message was sent, but the message will not display in your Sent folder. Note: Sending as District or Sending as School disables the ability to allow Student/Parent Reply. If you want to allow Student/Parent replies, you cannot Send as District or Send as School.
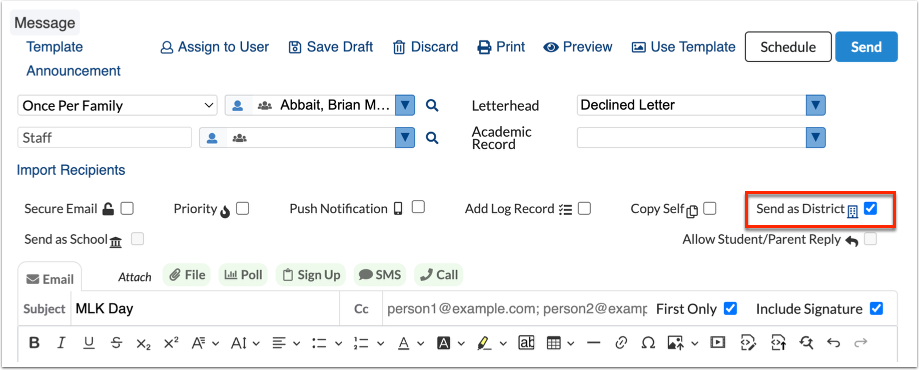
8. Enter the Subject of the message in the provided text box. If a subject is not entered, the subject defaults to New Message.
9. To copy other users on the message/email, enter the emails addresses separated by semicolons in the Cc text box. For example, [email protected]; [email protected]
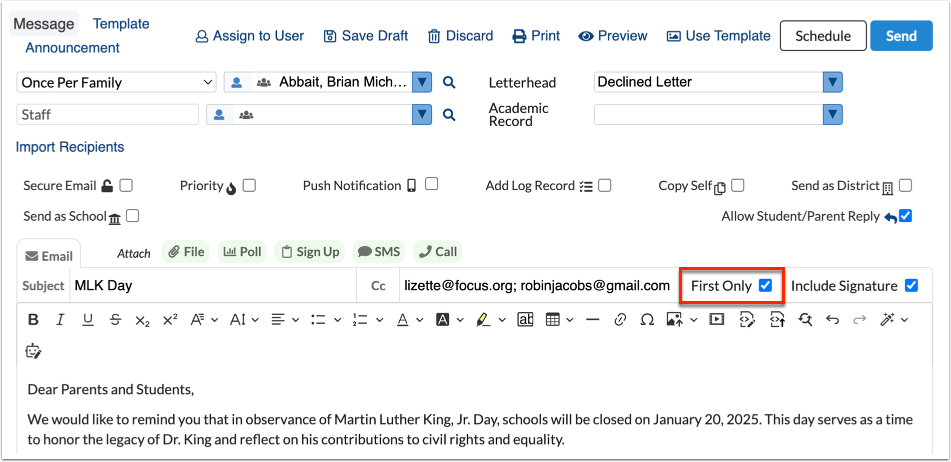
Select the First Only check box to copy the entered email addresses in the Cc text box on one email only. This ensures that if you're sending to 100 different recipients, the CC only receives the first email and not all 100 of them.
10. Enter the Email (message) in the provided text editor. There are a variety of tools available, including text formatting and the ability to add links and images.
11. Click Send to send the message right away or click Schedule to schedule when the message should be sent. Once sent, the message displays in the Sent tab.