Backing Up Your Explain Everything Mac App Files

Apr 23, 2026
 254
254
Before you start:
This process could take quite a while, depending on how many files you have. DO NOT close your laptop, disconnect from WiFi, or move locations, as this will prevent the process from completing successfully.
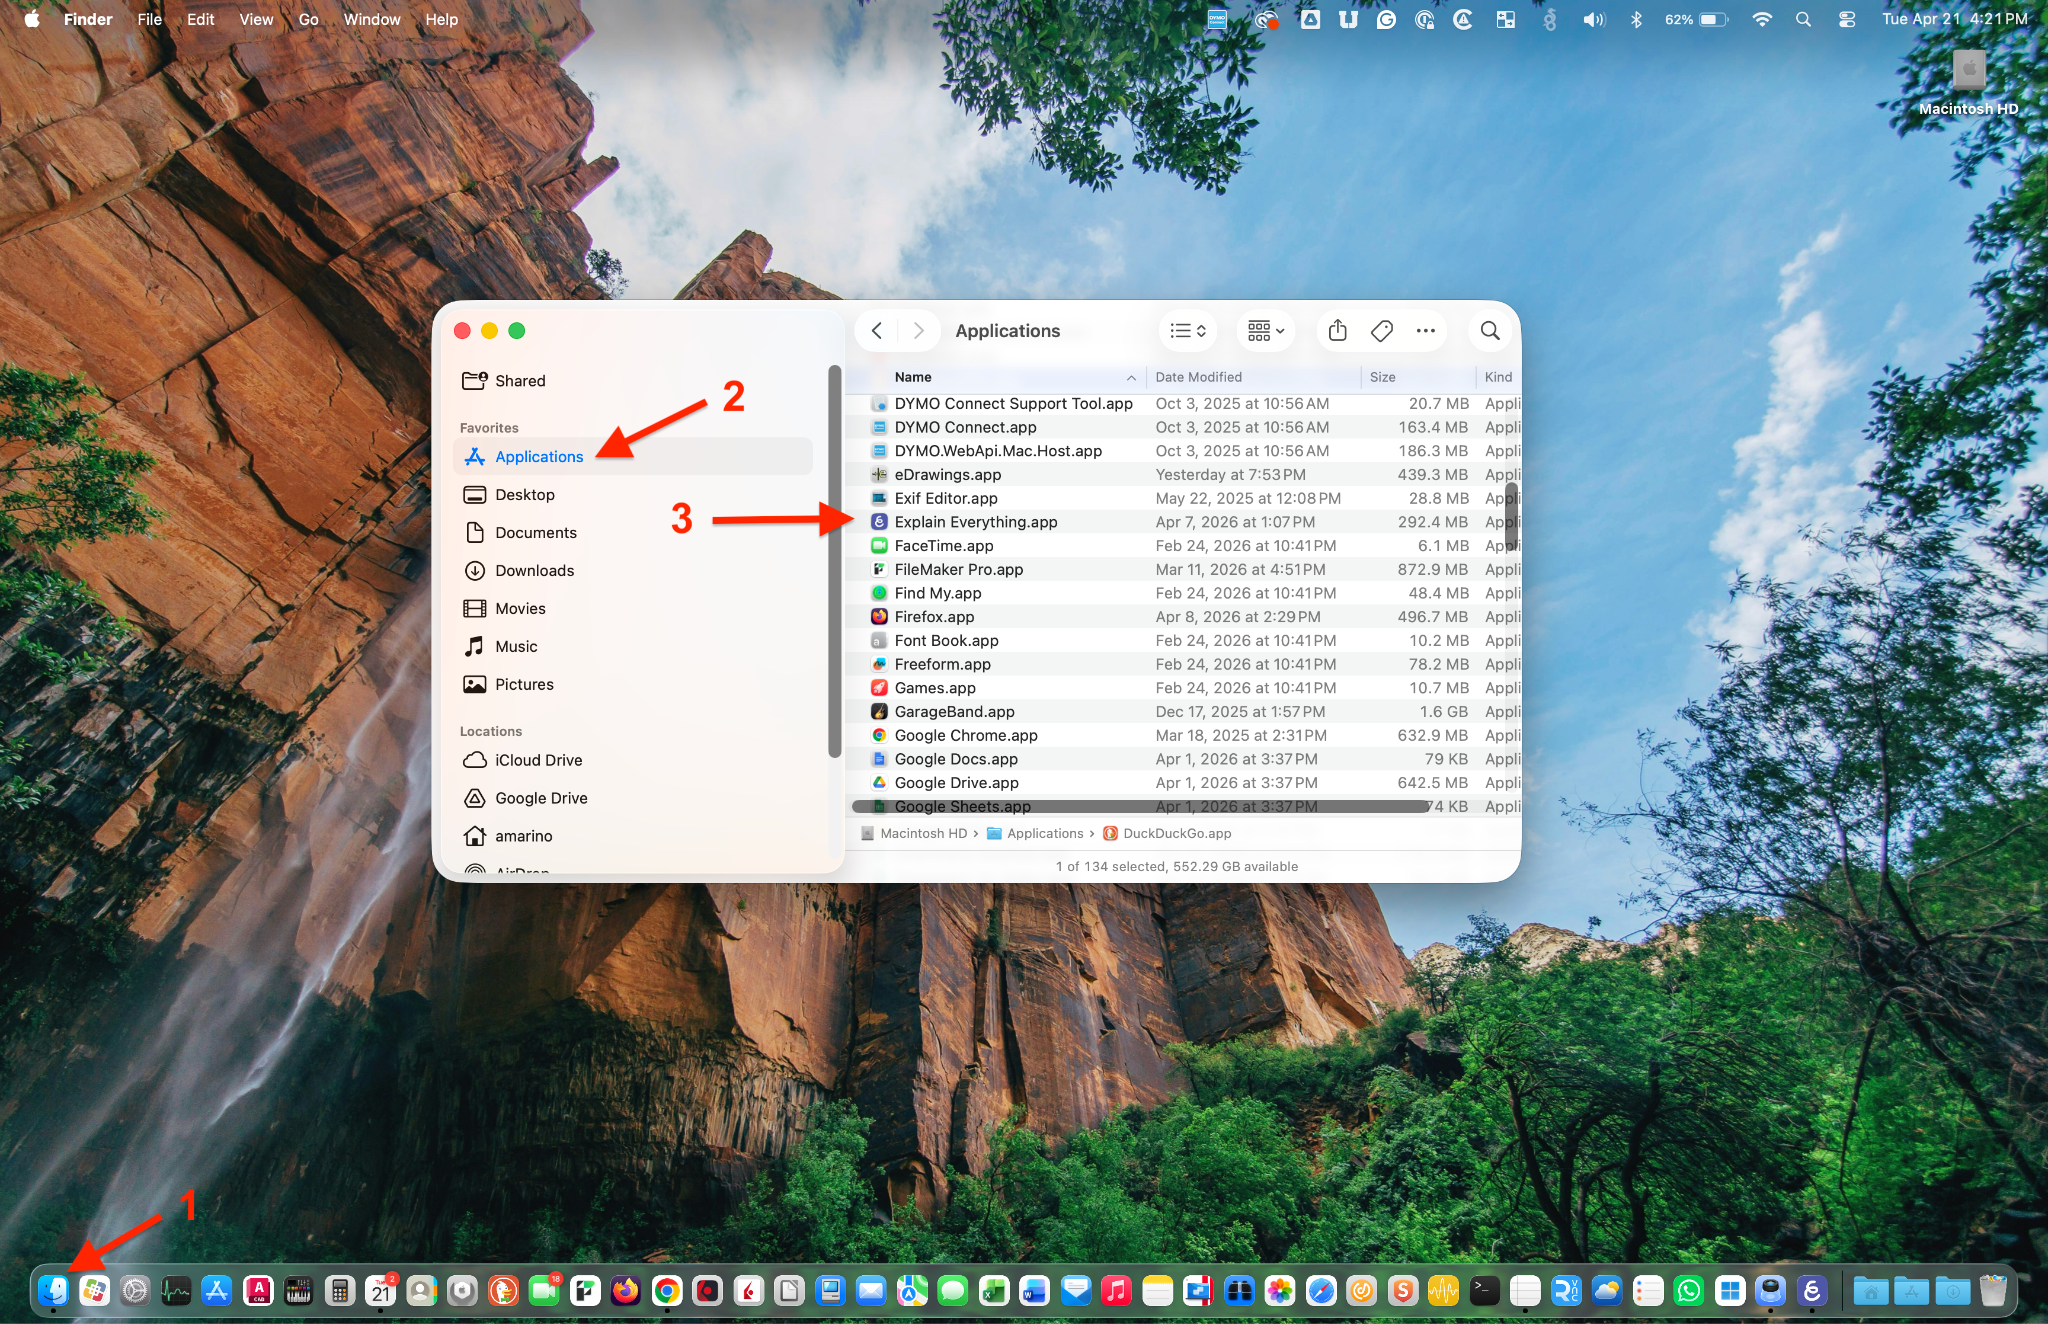
- Start by choosing Finder from your dock. [1]
- When the window opens, choose Applications from the side menu. [2]
- From the Applications folder that opens, on the right, choose Explain Everything. [3]
- Signing out and then back in is required to ensure that your account is properly authenticated
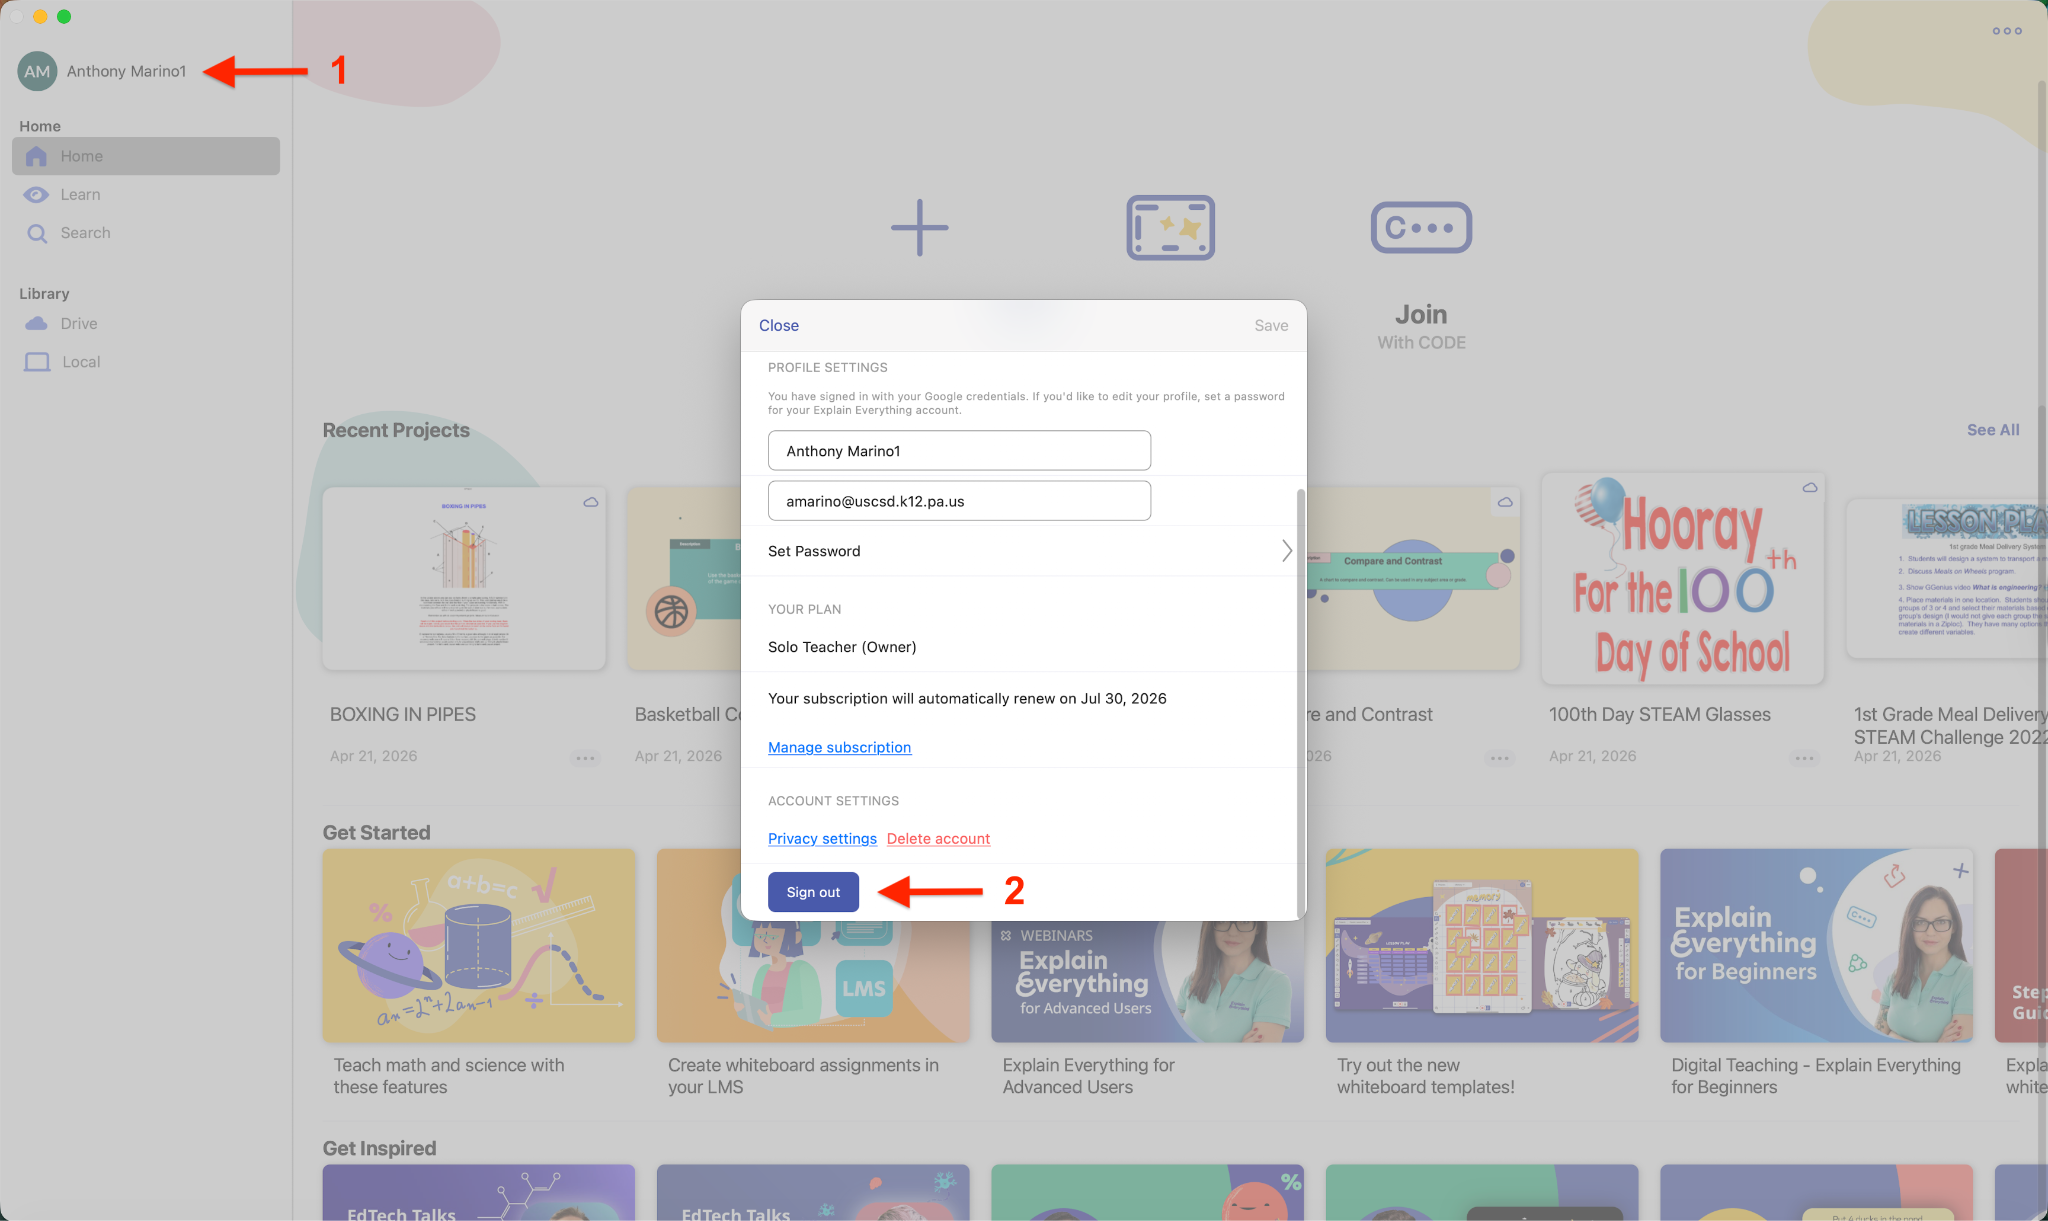
- Choose your username in the top left section of the side navigation panel. [1]
- When the window opens, scroll down and click the Sign Out button. [2]
- From this page, choose Sign in or create account. [1]
- When the next page appears, choose Sign in with Google and follow the steps as you normally would.

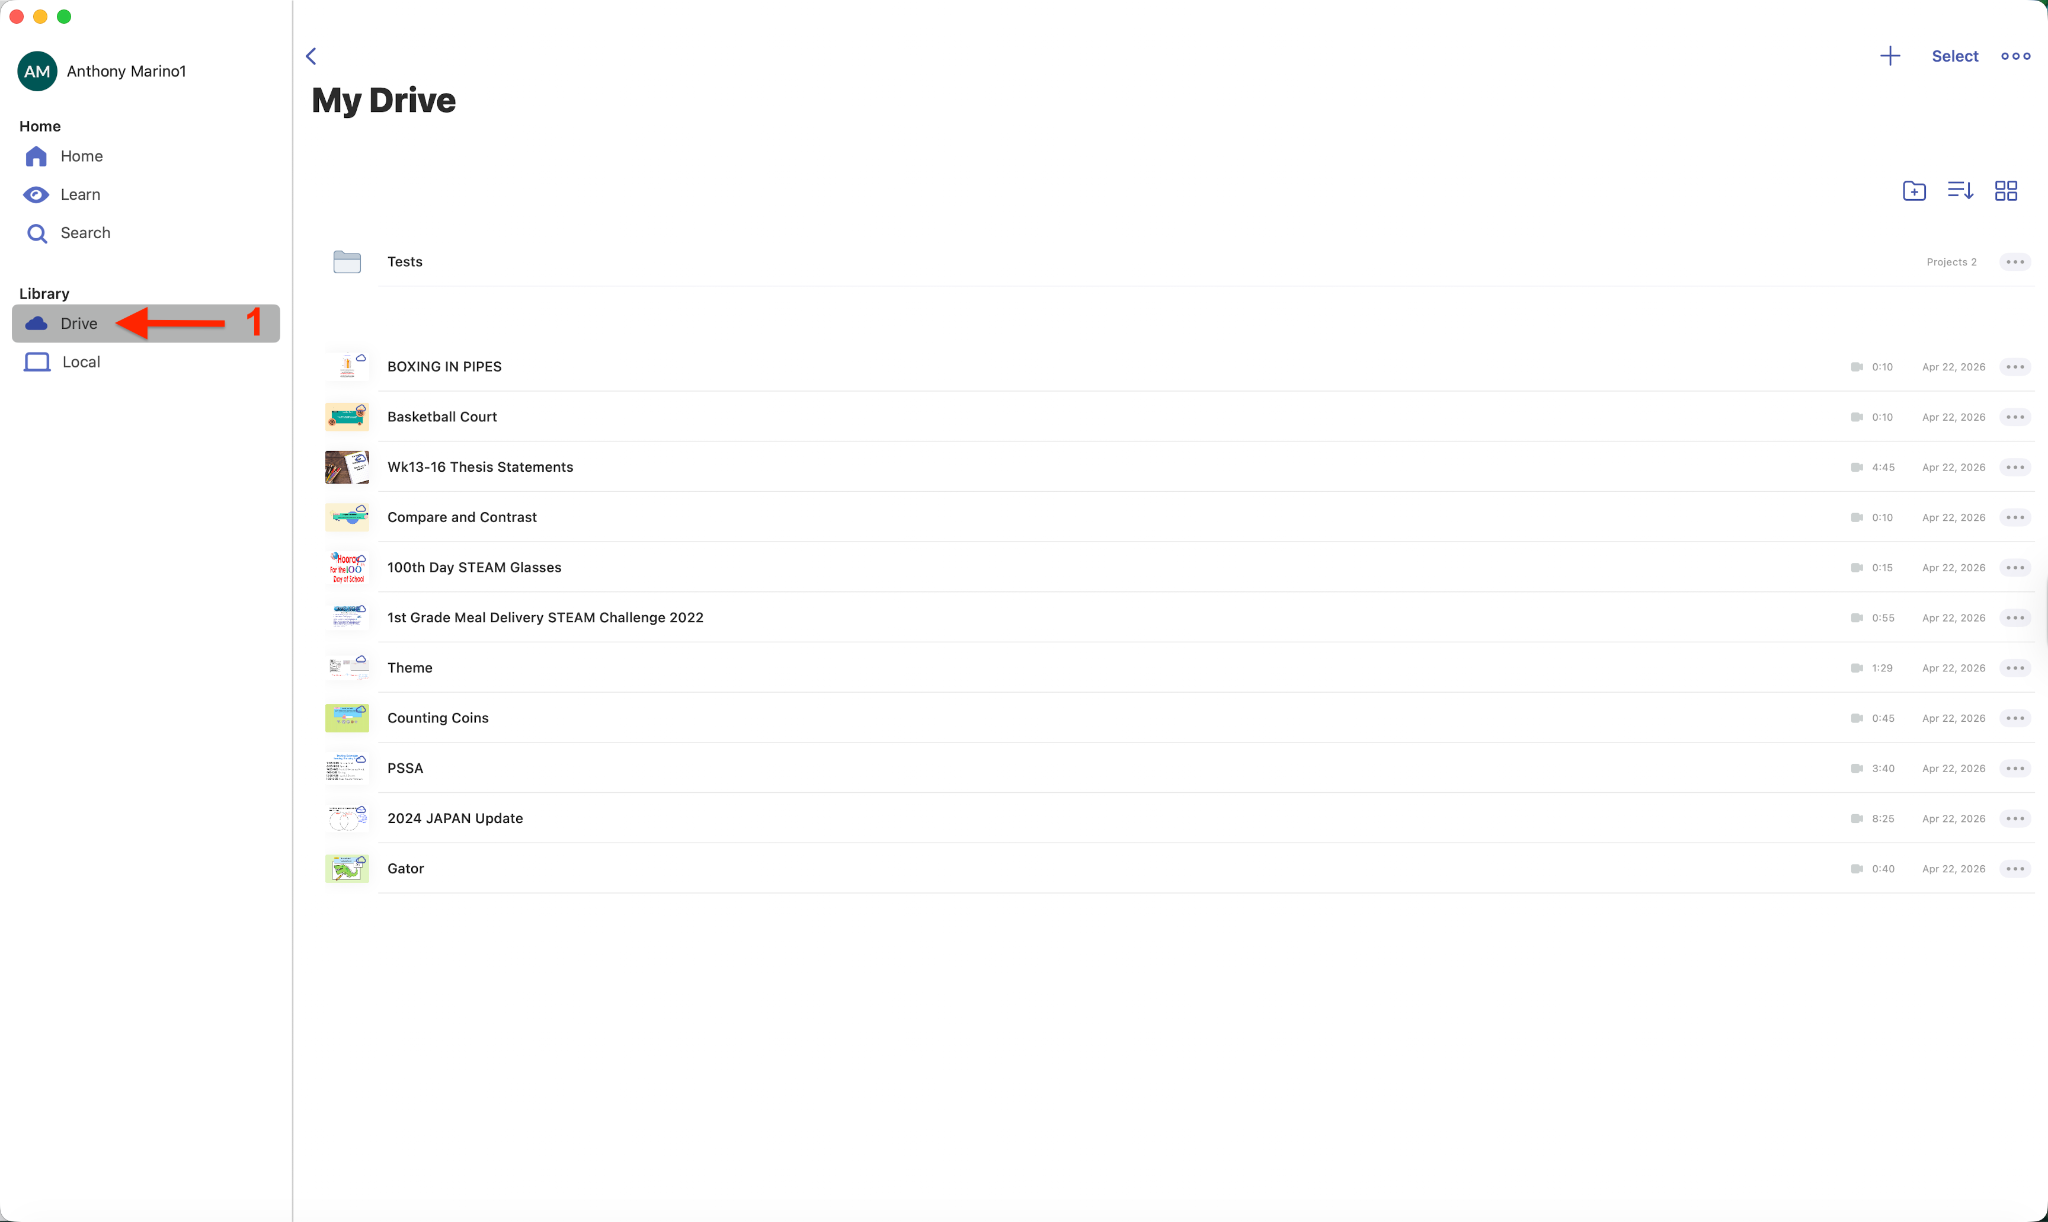
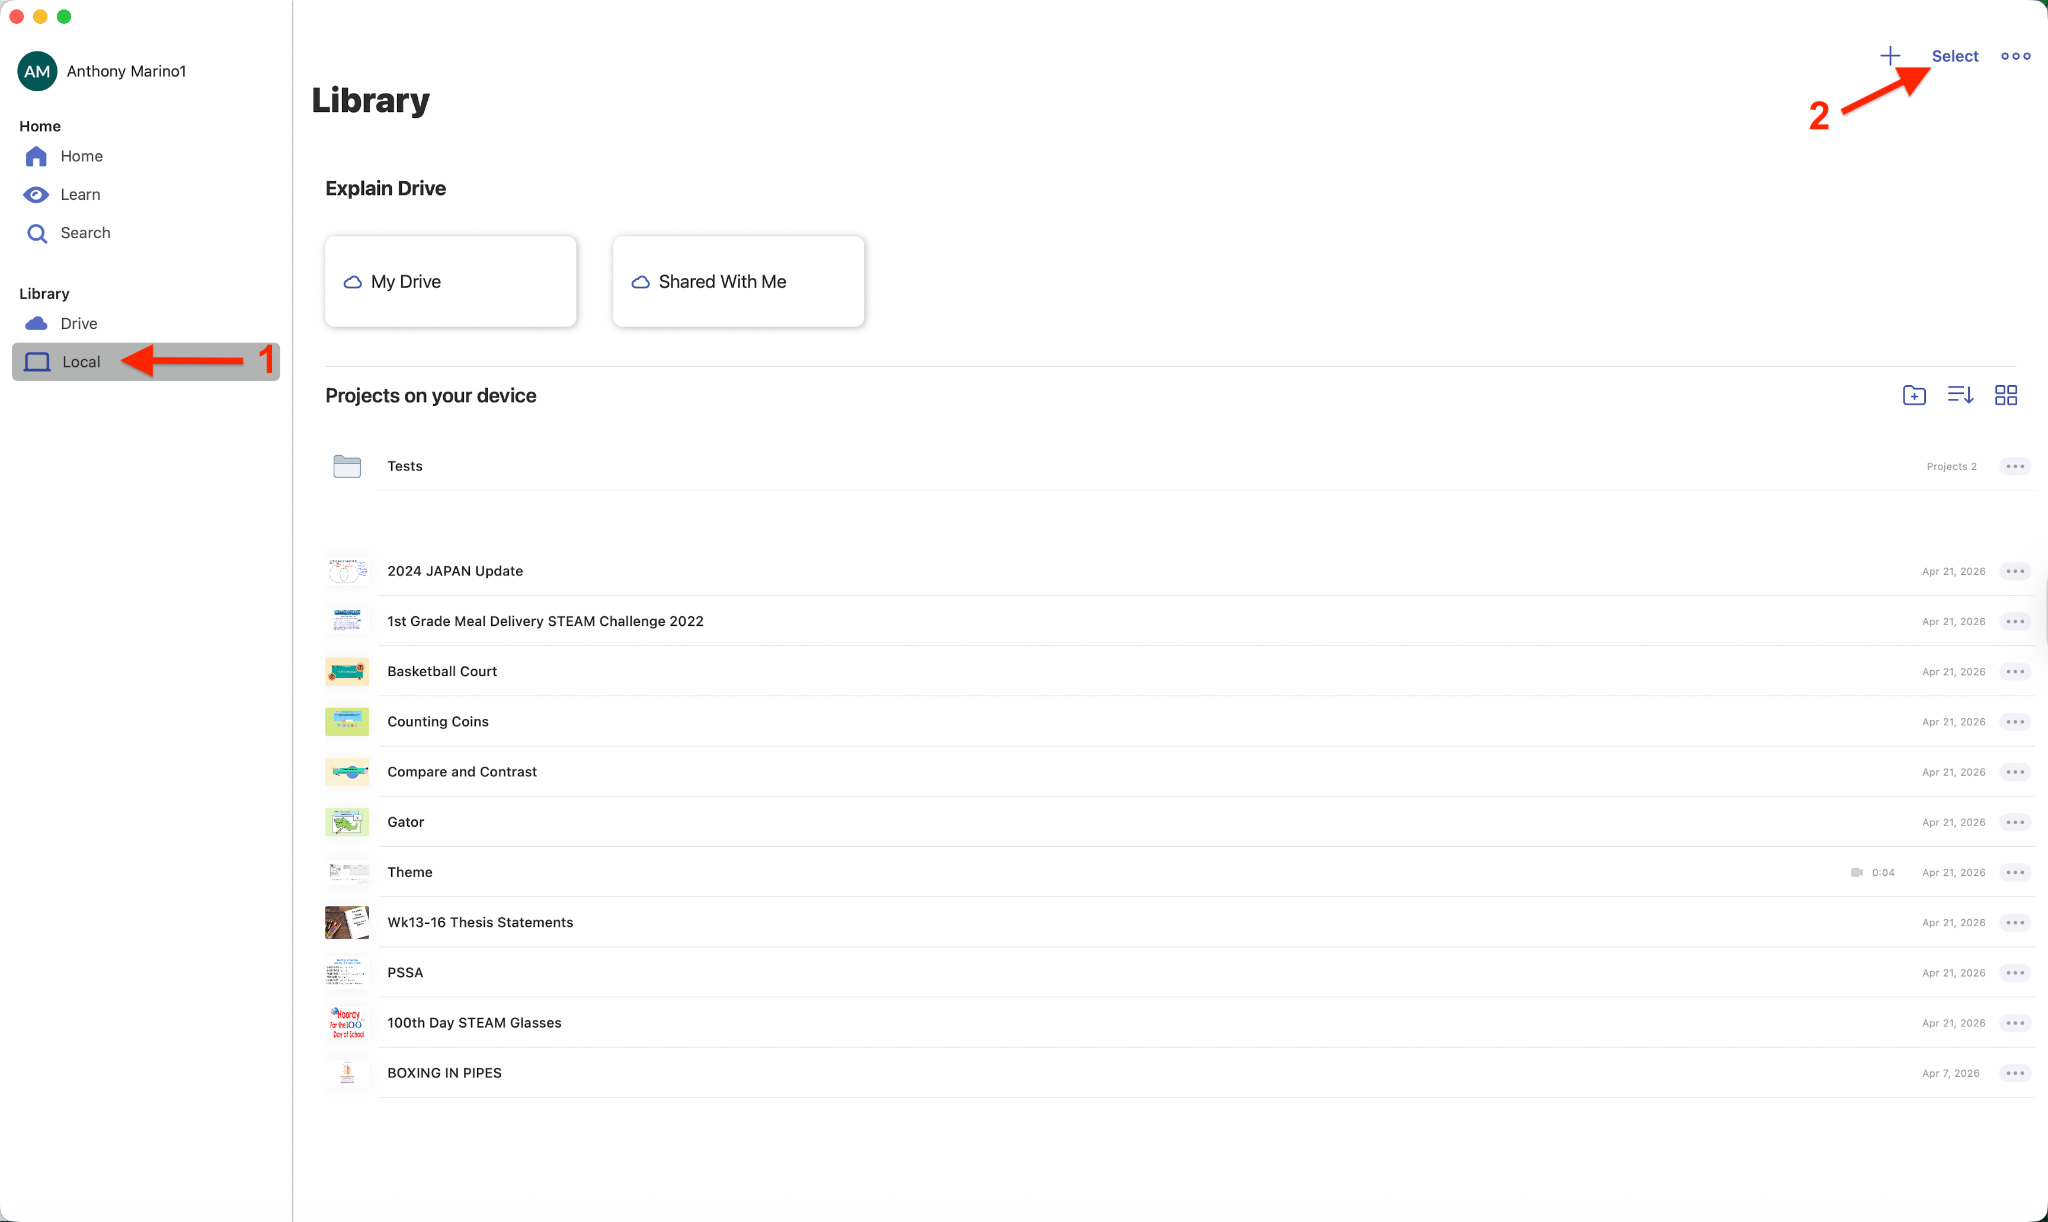
- Once you are signed in again, choose Local from the left navigation pane. [1]
- You will now see all of the files that are stored only on your current machine.
- Choose Select, then Select all from the top right corner. [2]
- You should now notice your Explain files highlighted in blue.
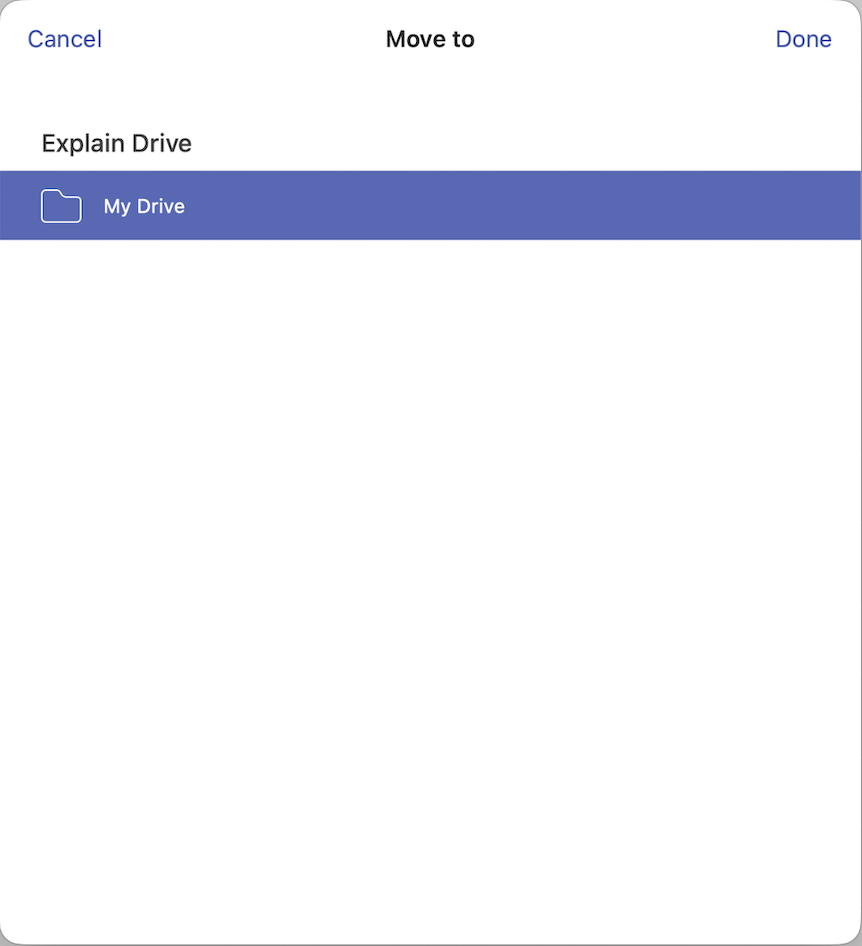
- Next, choose the move icon at the top of the screen. [1]
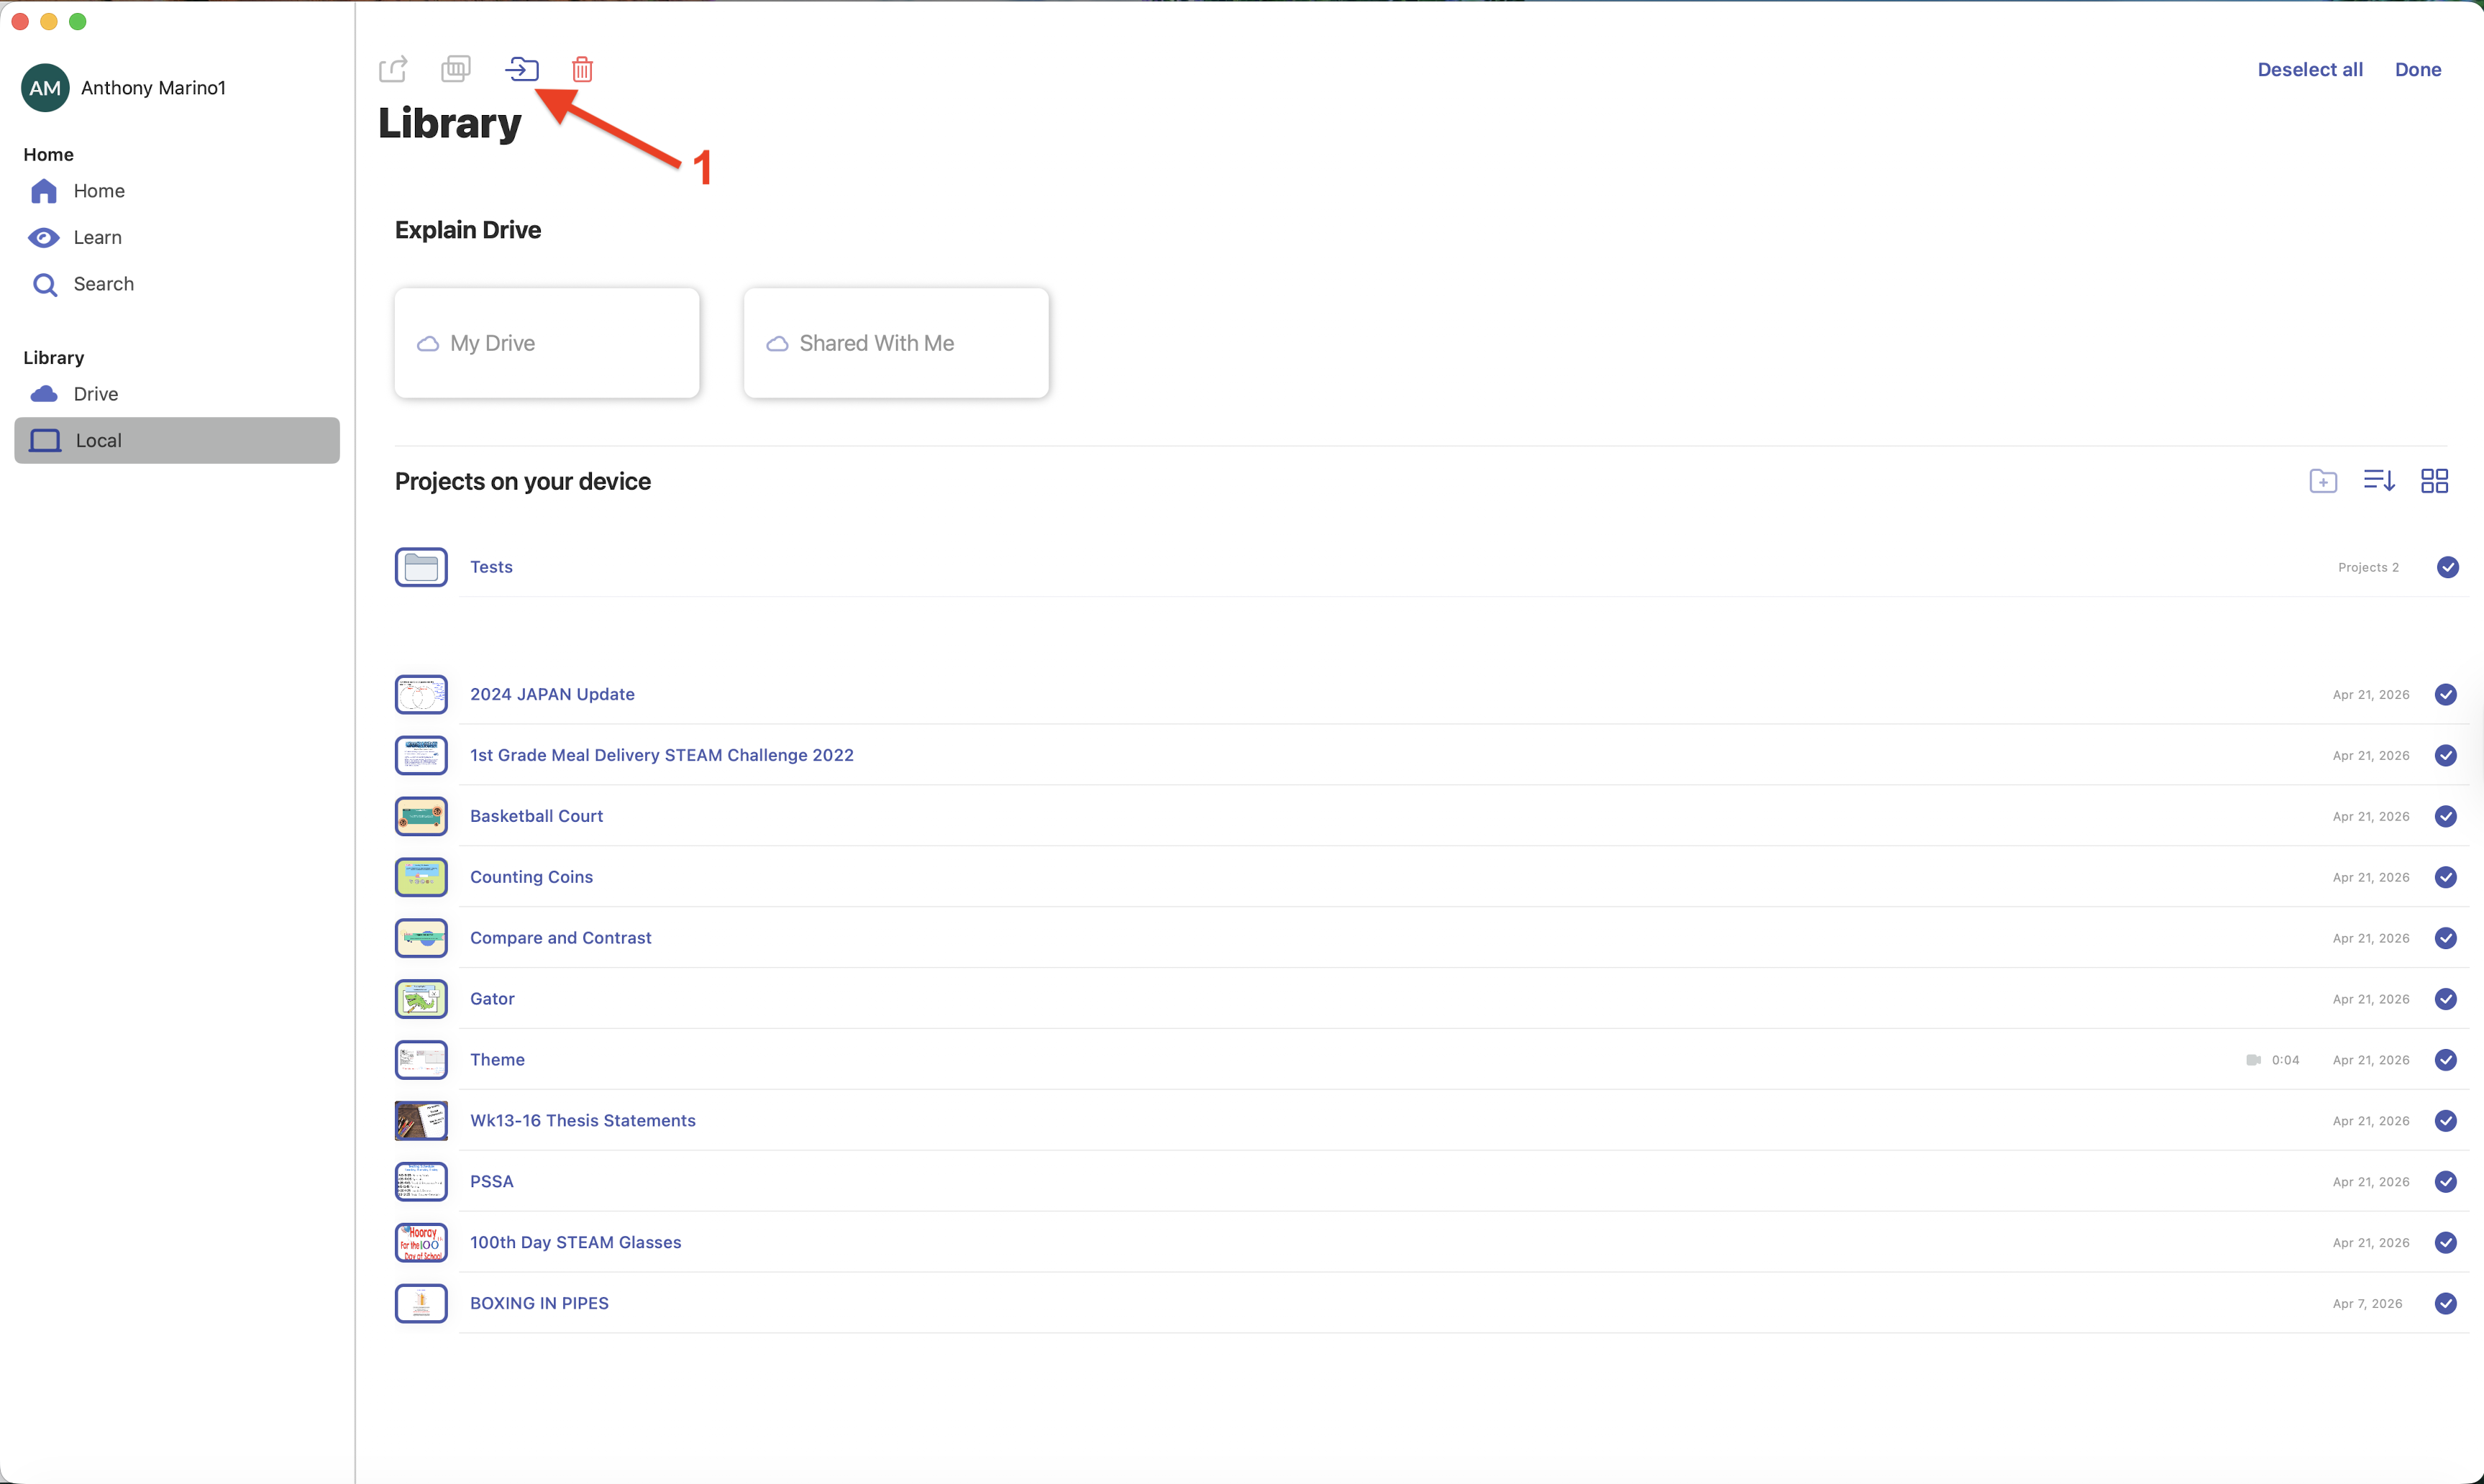
- Ensure My Drive is selected, then choose Done in the top right corner.
- Next, you will see a progress wheel showing the percentage of completeness.
- As mentioned earlier, DO NOT close your laptop, disconnect from WiFi, or move locations, as this will not allow the process to complete successfully.
- When the following window appears, choose Cancel.

- Finally, choose Drive from the left navigation menu. [1]
- You should now see all of your files under this location. This is Explain Drive, which is Explain Everything’s cloud storage. This will allow your files to sync between devices, so they can be used on your new Mac, Chromebox, and the web.